
Table of Contents
Sell Online with Stripe & Forminator – Introduction
Hi folks, in this quick and easy E-Commerce Tutorial I am going to show you how to get set-up quickly and sell online products, subscriptions and courses with Stripe Payments and Forminator. Two of my go-to plugins for E-Commerce solutions that fall outside the scope of larger stores where WooCommerce would normally be used.
This tutorial assumes you have some basic knowledge of WordPress and how to navigate some of the fundemental features of the CMS such as plugins, custom styling components through CSS or making minor changes to form layout and typography. If you require more help than listed please let me know in the comments below.
Images in this tutorial can be expanded by clicking – providing more insight into the actions being taken in each step.
Stripe Payments – What is it and why should I use it?
Stripe is a technology company that provides a set of tools for online businesses to manage and accept payments over the internet. The company was founded in 2010 by Irish brothers John and Patrick Collison. Stripe’s platform is designed to make it easy for businesses to handle online transactions, including payments, subscriptions, and billing.

Forminator – A powerful WordPress form building tool.
Forminator is an extremely powerful and versatile drag and drop form builder from WPMUDEV. I have been working with WPMUDEV now for over 8 years and they are simply an outstanding company that provide top quality products, plugins and services for WordPress. With Forminator you can create instant forms with their pre-existing templates or take your creativity for a spin with custom design.
The sky is the limit with Forminator. You are free to dig as deep as you like with technical and design related customisation, conditional logic, payment processing (which we will dicuss in this article through Stripe Payments).

Sell Online Quick Set-Up Steps.
#1 – Register with Stripe
First off get signed up to Stripe, I left a link above but in case you missed it here it is again – Register for Stripe Payments. The important thing to remember when registering for Stripe is to follow all the steps in the set-up guide and read the information being presented to you. It should take no longer than 20 minutes to achieve a fully realised Stripe account. Once you’re set-up, have been verified and your bank account details have been attached it’s on to the next step.

#2 – Download / Install Forminator
ff3974Next you will want to install Forminator on your WordPress Website, you can either download the plugin from WPMUDEV directly or simply search for ‘Forminator’ in the plugins section on your WordPress Website. Once you have the plugin installed it’s time to move onto the meat and potatoes of this tutorial; enabling your website to sell online through Forminator and Stripe Payments.
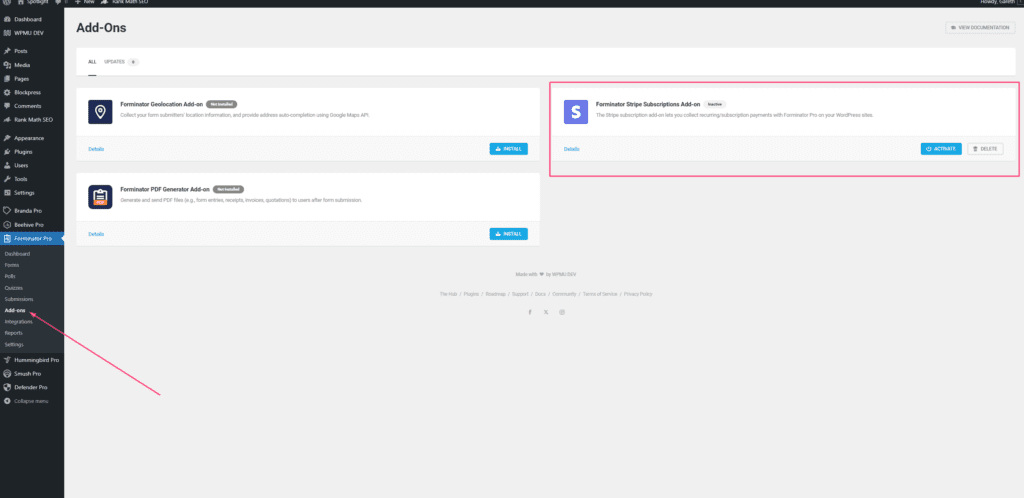
#3 – Active & Connect Stripe Payments in Forminator
Once you have Forminator installed navigate down to the plugin and click on ‘Add Ons’ – On the right hand side click on ‘Activate Stripe’. Once you have done this the activate button will read configure, select this and input your Live and Test keys. Your Stripe keys are available in your Stripe App Dashboard:


With our keys now connected we are ready to create our new Form and start processing payments through Forminator.
#4 – Payment Form Creation & Testing
In these last few steps we will learn how to create our new form, add in custom payment properties and test the results using our sandbox environment through Stripe’s ‘Test’ gateway. To start things off lets create our new form in Forminator:
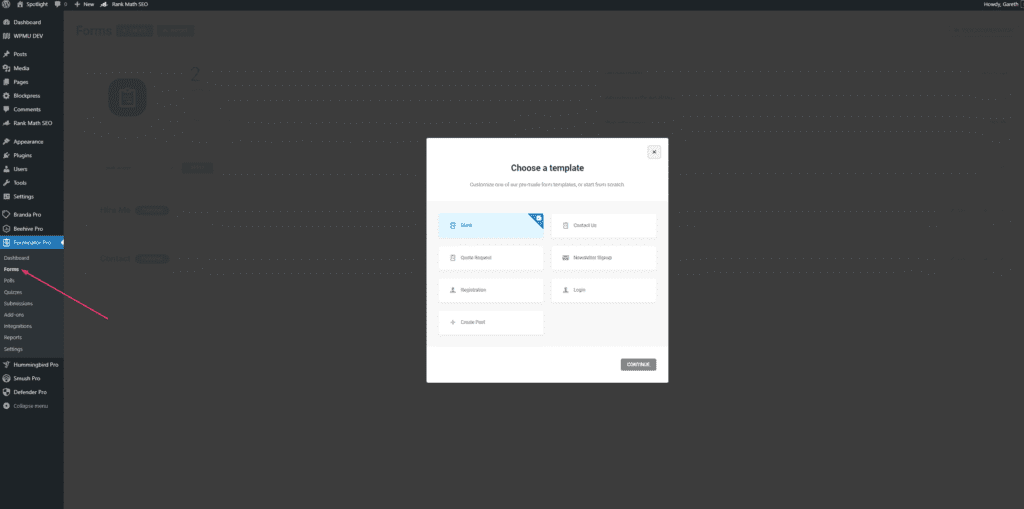
Select forms as above and ‘Create New’, from the options we are just going to choose ‘Blank Form’ – you can name it anything you like here, so make it relevant to the product or service you are providing. For the sake of this tutorial I have named ours ‘Sell Online’.
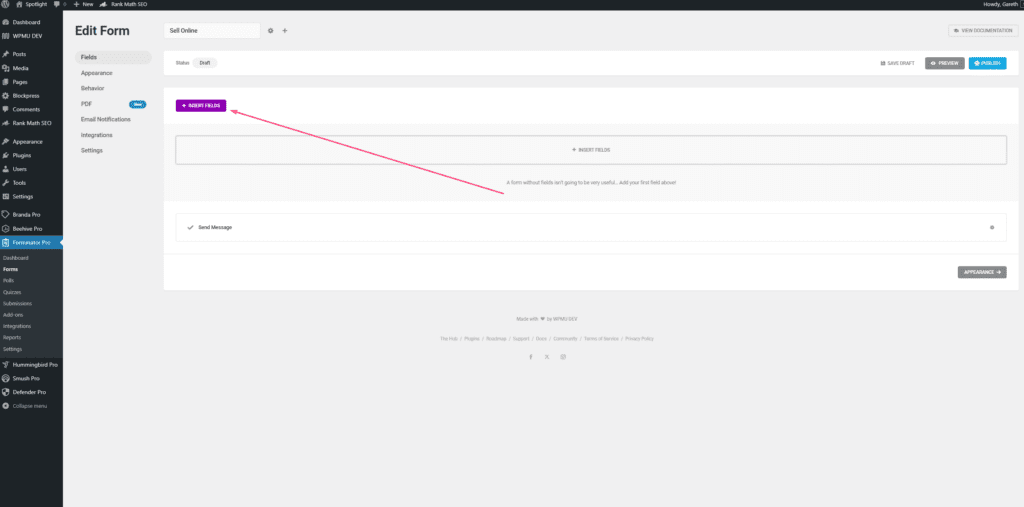
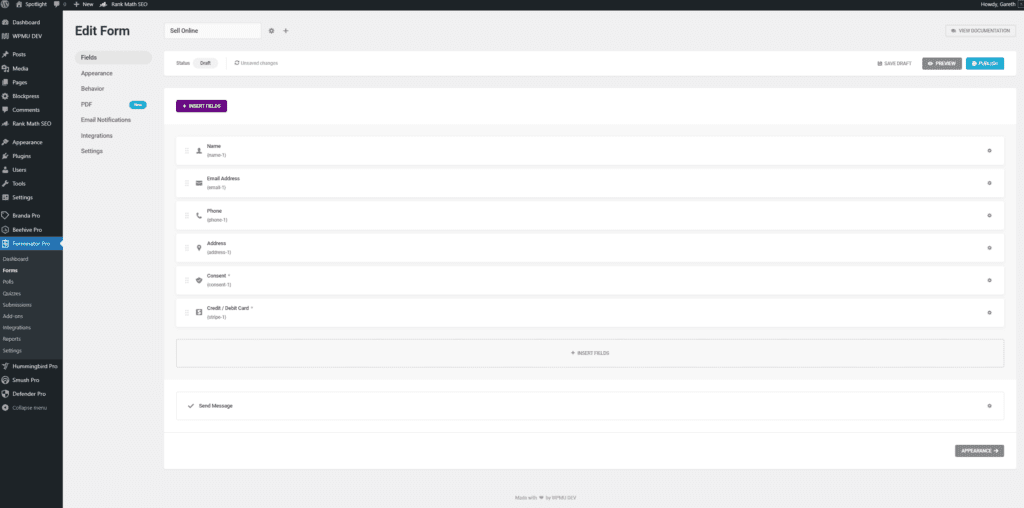
Once you have created your form the next screen will be blank until we start populating some fields. The presentation will look something like this depending on when you are viewing this article (plugin updates can sometimes change UI elements)
#5 – Form Examples & Payment Setups
Now that we are all set up with our various requirments and have begun on our journey to creating our first form I am going to demonstrate three scenarios where you might employ your new E-Commerce system to start selling online products, courses and subscriptions. The form payment options I am going to create are:
- Simple once off set amount payment
- Variable payment where customer can choose custom amount
- Subscription set-up for membership or course products
Please be aware that the above payment options can not co-exist on the same form unless you employ conditional logic to help Forminator understand which plan to process. The purposes of this tutorial was to show how to achieve the initial set-ups and create the specified plans for your forms, be it one off payments, subscriptions or a voucher / gift card type system with variable payment amounts.
Once you have completed this tutorial you will need to only use the plan that is applicable to your goal. If you would to know more about conditional logic and how you can leverage this functionality to further enhance your forms then let me know in the comments.
#5a – Set Amount Payment Form
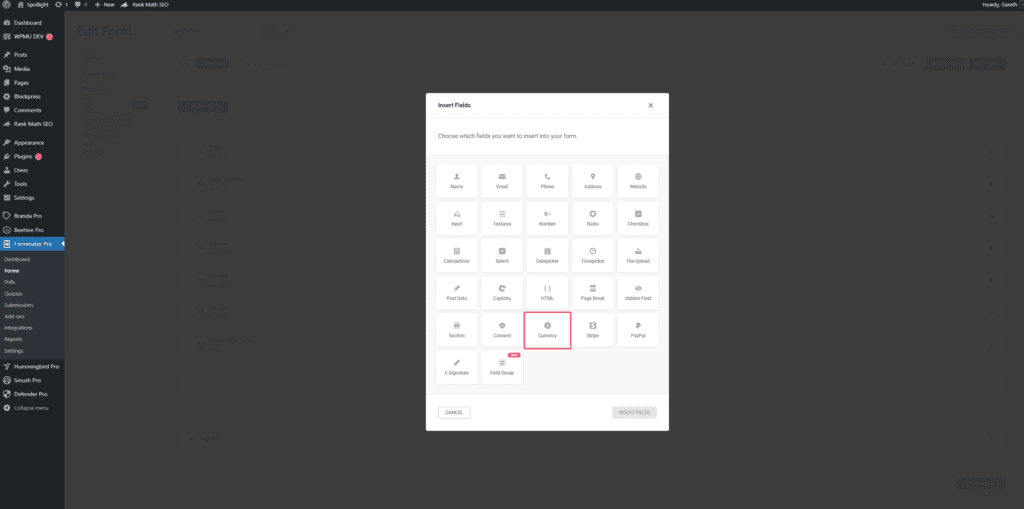
First, lets set up our fields. Click on ‘Insert Fields’ in the top left once inside your form editor.
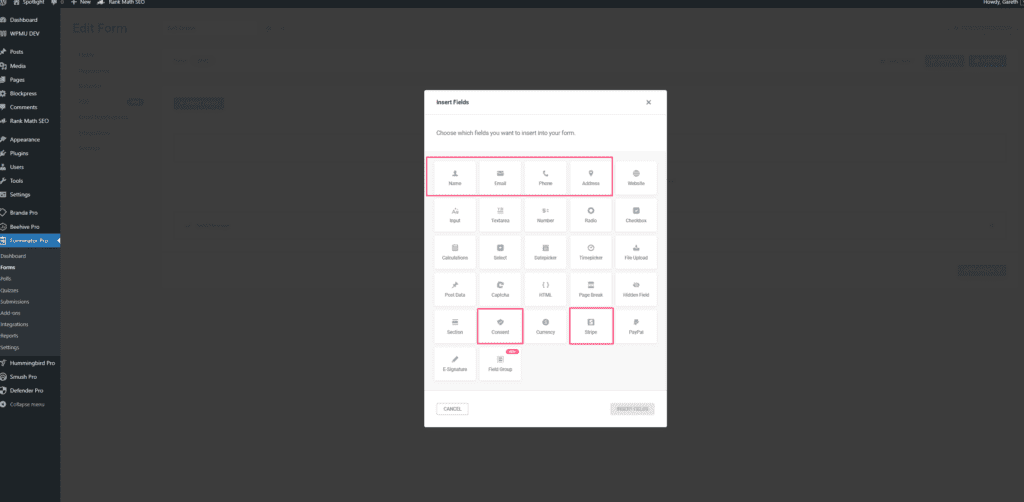
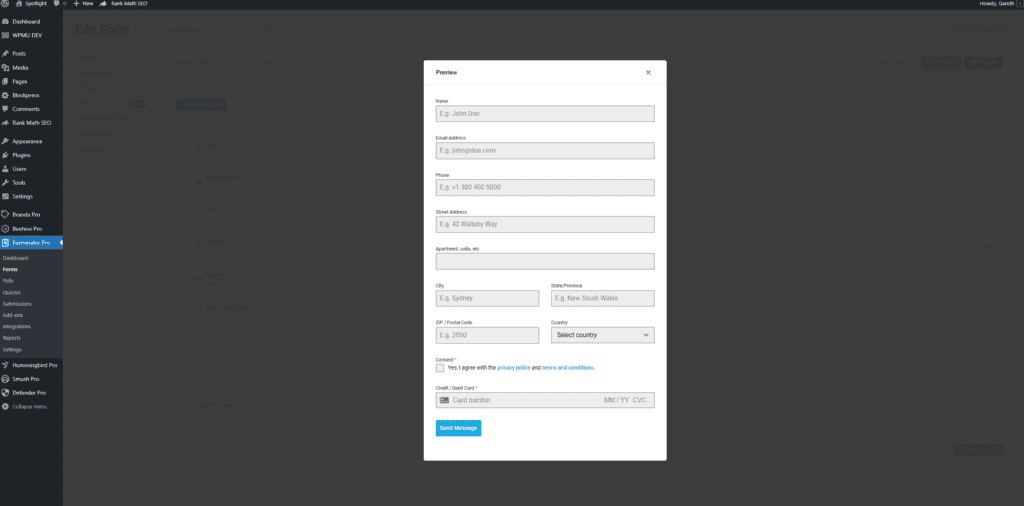
For the purposes of this example we are going to choose the fields: Name, Email, Phone, Address, Consent and Stripe. These should be fairly self explanitory with the exception of ‘Consent’ which is to facilitate your compliance with GDPR in Europe. I would encourge you to play around with these fields – and others – to get a better understanding of them and how these data sets can affect your form.
Once we have choosen our fields and selected insert fields our form should look like in the image below. You’ll notice to the left are additional options such as appearance, behaviour and email notifications ect… When you have become more comfortbale with the plugin you can affect more changes here to how the form is processed, what it looks like and more – the only field you will need to actively enage with is ‘Email Notifications’ and perhaps ‘Behaviour’ where you will want to have your own email listed for notifications on form submissions / sales and amend the form submission messaging to reflect the specific product or service in behaviour.
You can click on your fields here to open up specific related options (referencing the below image). Please spend some time looking at these to understand what can be altered going forward. The settings are basic, such as placeholders and such but it is good practise to always educate yourself on available options. Once you’ve looked through them, please proceed to click on the last field: ‘Credit/Debit Card for Stripe’.
Our options for Stripe are presented across the top in this pop-up field. We are going to be focusing on the settings tab here. Starting out, we want to make sure our payment mode is set to ‘Test’ so we can perform a few transactions afterwards to verify everything is working and were happy with the user journey. Once we agree that everything is in order this can then be changed to ‘Live’.
We also want to make sure our currency is set to whatever local variation is appropriate in your region.
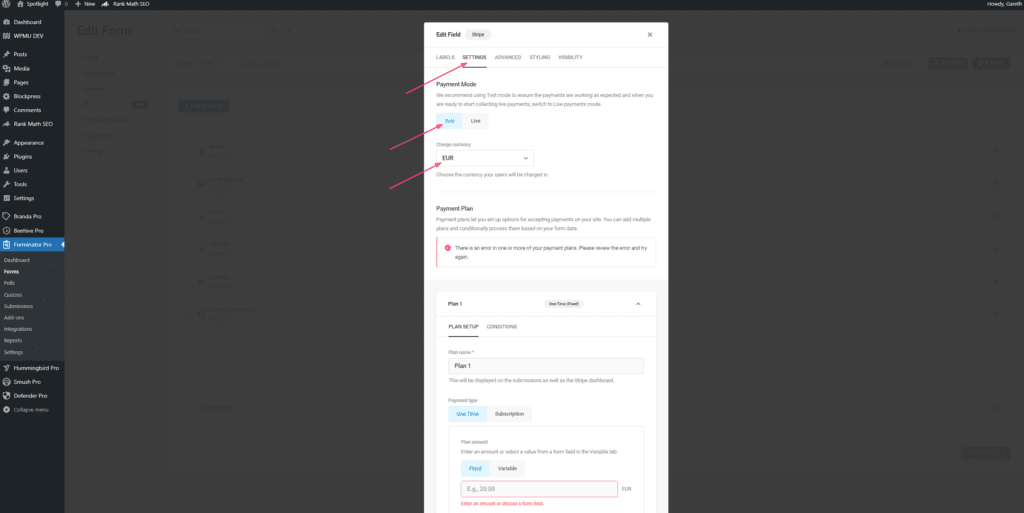
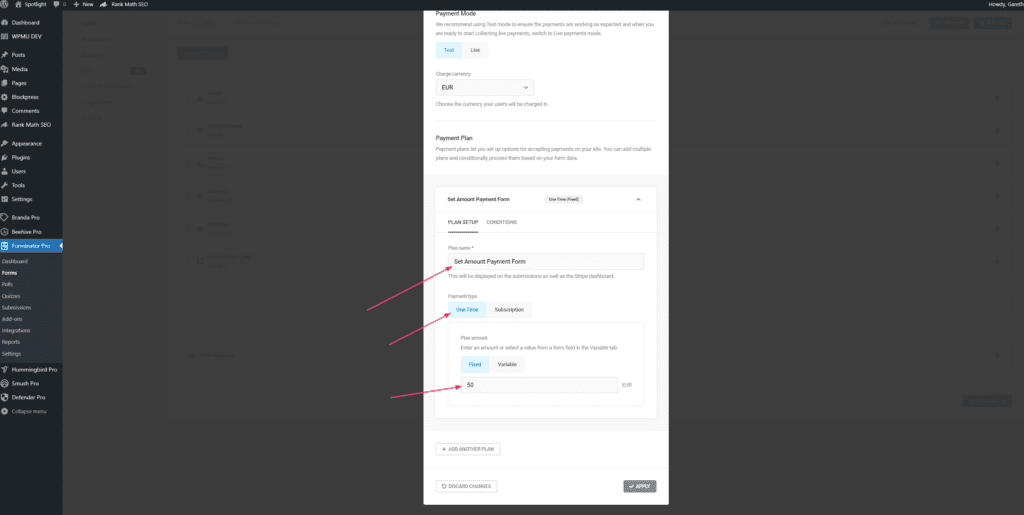
Moving further down, we are going to set the parameters for this Set Amount Payment Form. In the plan setup we want to give our plan a name that reflects the product. In our payment type we will be selecting the ‘One Time’ (we will return to explore other options shortly) payment option and setting our value to ‘Fixed’ in the plan amount below. Put whatever value in here that is appropriate. We will go over the variable amount in the next form.
Once we have all of the above done click on the grey ‘Apply’ button to submit your changes.
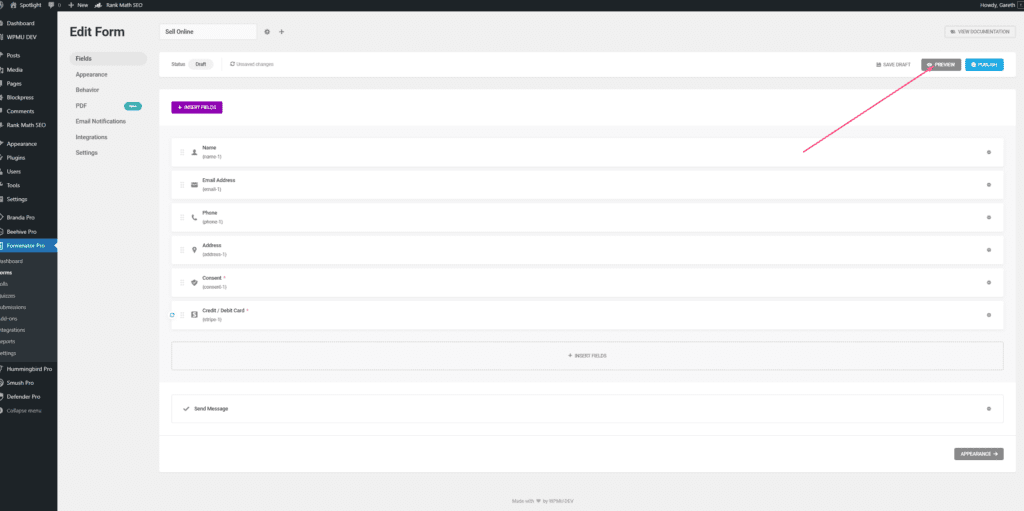
Lets check to see how our form is looking. Select the ‘Preview’ button in the top right to generate your new form.
Our new Set Amount Payment Form is almost complete, lets hit the blue ‘Publish’ button that sat next to the grey ‘Preview’ button in the last step once we’re happy with everything in the screenshot below.
Once our form is published you will be given the Forminator forms shortcode which can be placed in any page or post. Simply copy the shortcode and place in into your content section on any page or post within WordPress to render your new payment form.
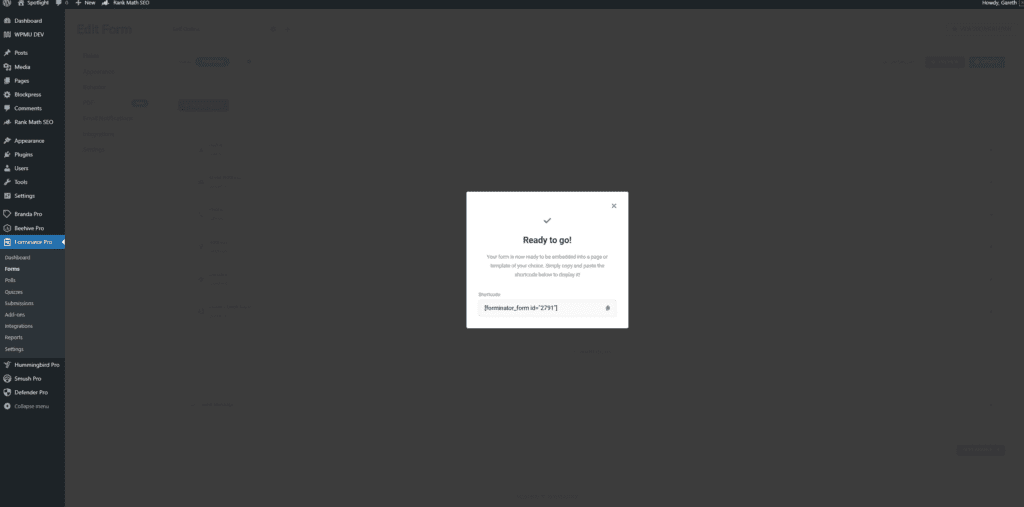
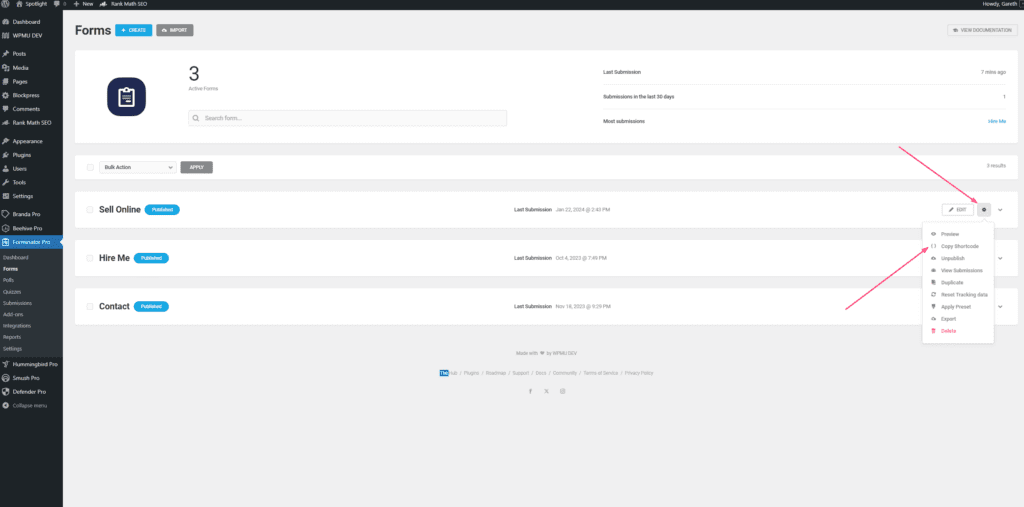
If at any point you lose your shortcode it can be retrieved again by returning to your forms in Forminator, clicking on the cog icon and then selecting ‘Copy Shortcode’.
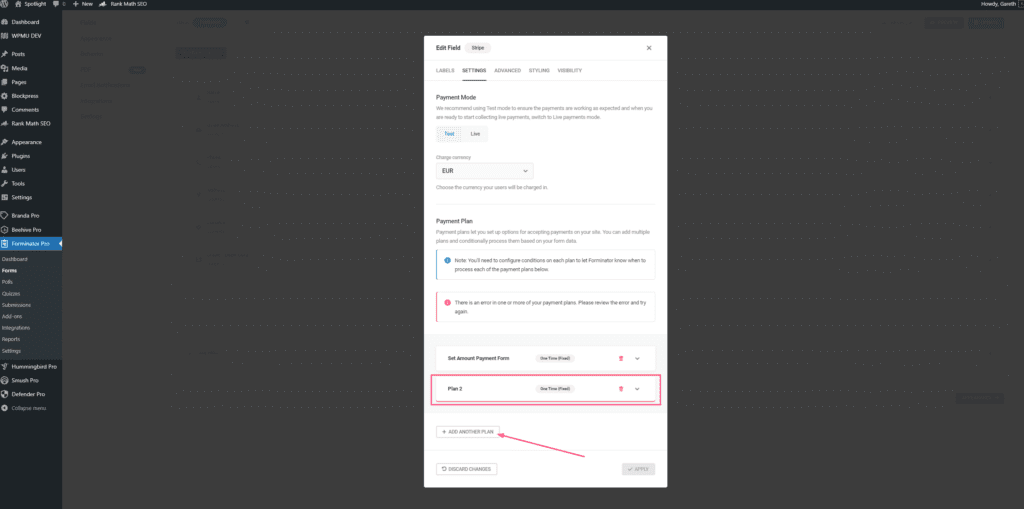
So, that’s out basic setup. We have our form created and working with Stripe to Sell Online products that we can now manage through Forminator. From here we can add in new plans, create subscriptions or set up variable payments where you can give your customer the option to pay off a custom amount – this functionality may be most useful in a scenario where you would be selling vouchers or gift cards. Lets take a look at these now, starting with adding a new plan below. Click on the ‘Add Another Plan’ button to begin.
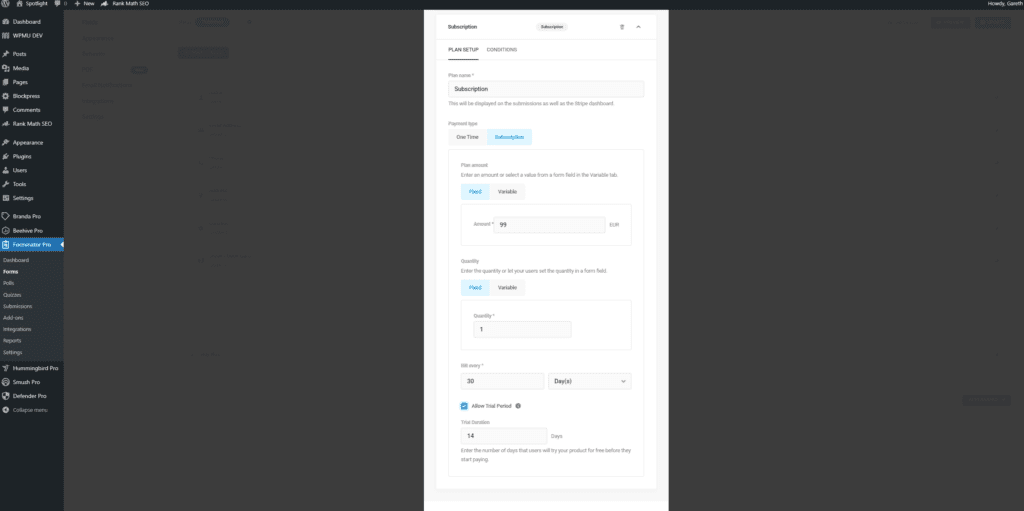
#5b – Subscription
This time we are going to select the subscription method from the list of available options. In our plan setup we are going to name or product ‘Subscription’ – payment type will be set to ‘Subscription’ and our plan amount is going to be ‘Fixed’ with a price of €99. You can specifiy a quantity in the ‘Quantity’ field should you need to also. After this we are going to set the billing cycle in the ‘Bill Every’ section followed by whether we wish to provide a trial peroid for customers.
Once you are happy with your changes go ahead and click on the grey ‘Apply’ button at the bottom right to update your form and then the blue ‘Update’ button at the top right yo publish or changes.
#5c – Variable
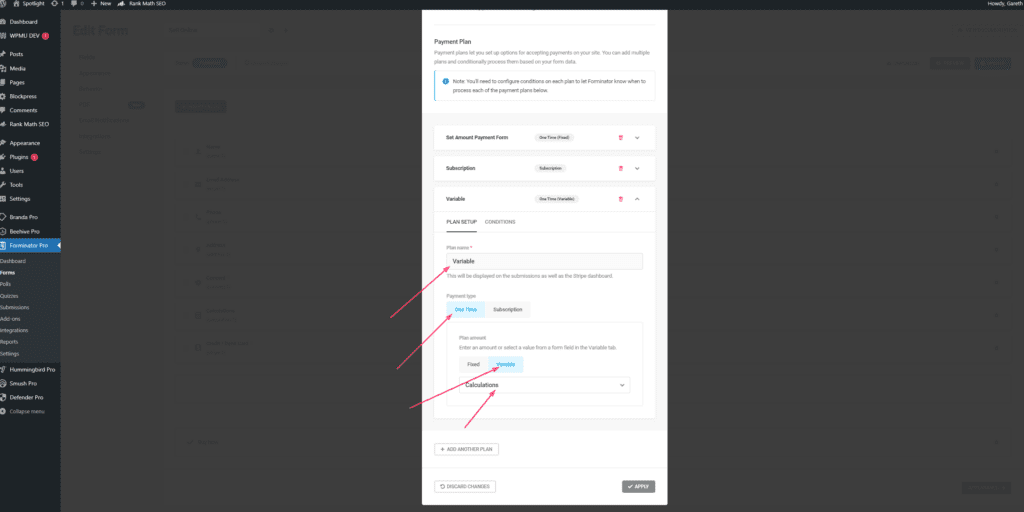
Lastly, we are going to set-up a new variable payment plan. But before we do this we need to setup a new field to enable this functionality. In your form, add in a new field ‘Currency’.
Return to your plan settings by clicking on the Stripe ‘Credit / Debit Card’ field and going to settings. Add a new plan and name it ‘Variable’, set the payment type to ‘One Time’ and the plan amount to ‘Variable’. This will prompt you to select the currency field we created a moment ago, do so now and hit ‘Apply’ and then publish your changes once more.
#6 – Closing Comments
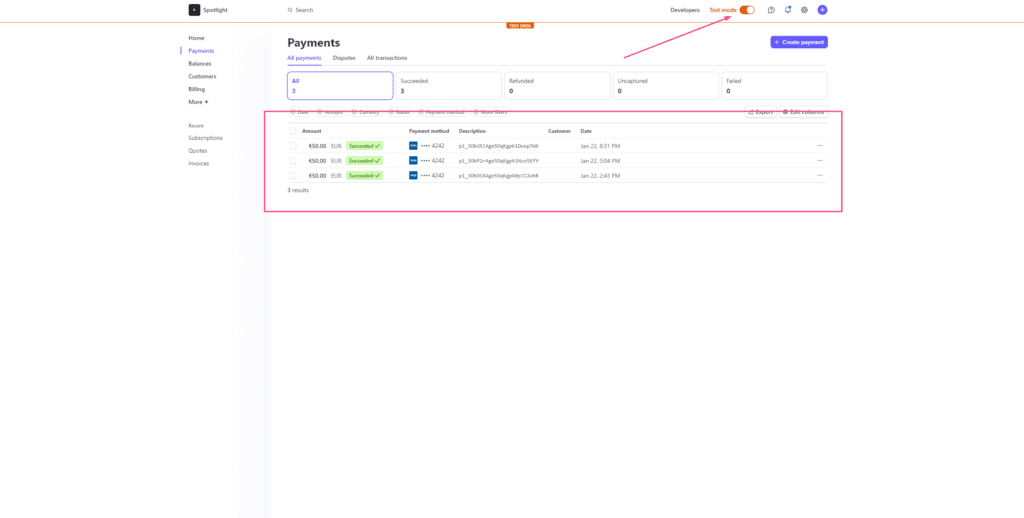
With all your parts in place your form is now capable of accepting payments for One Time Payments, Subscriptions and Variable Payments pending which plan you use. Play around with your new form and make some test transactions to see how it all works. See how your submissions reflect in your Stripe account, making sure you have ‘Test Mode’ checked to see the payments.
Thank you for taking the time to view this tutorial on how to Sell Online with Stripe and Forminator.
– Gareth